The Jobs Window
Your print jobs are displayed as a grid of tiles in the Jobs window. These jobs are created by the Printer Company. Clicking or tapping a tile opens the job.
1 Main menu button
2 Grid button to return to the Jobs window
3 Job tile
4 Empty job (file not placed)
5 Search box
The jobs you see in the Jobs window are the jobs that require action by you as an approver or as an uploader. Administrators and Customer Service Representatives (CSRs) can see all the current jobs of the company. The total number of current jobs is indicated in the top left corner, next to the menu button. The menu button provides access to more advanced features of the application.
Job Tiles
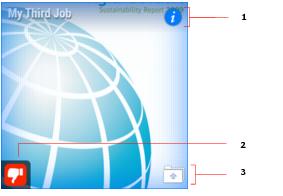
A job tile shows a preview of the first page of the job. The tile is blank if no pages have been assigned to the job or if the first page is still empty. The title of the job is displayed in the top left corner of the tile.
An Alert icon in the bottom left corner of a tile indicates that the job needs attention because a deadline is about to expire or pages have been rejected. Clicking this alert icon opens the job information panel and displays information about the actions you need to take.
1 Opens the information panel
2 Alert
3 Click to upload files
Job Icons
| | Alert: Job is approaching the deadline or it is overdue. |
| | Alert: Job includes rejected pages. |
| | Job has preflight issues |
| | Opens the Job Information panel. |
| | Upload: Opens the Upload Files window. |
Information Panel
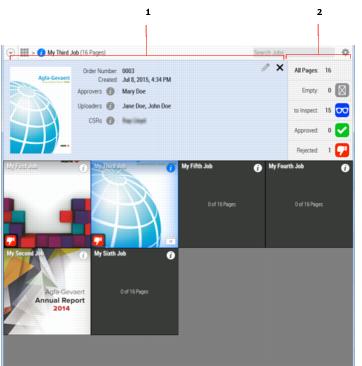
Additional information such as the total number of pages, approval status, users involved in the job and deadlines, can be found by clicking the Information icon in the top right corner of the tile.
Figure 1.4: Jobs window with the Information panel of a selected job
|
1 Information panel
2 Page status overview and filter
Clicking a page status icon opens the Flipbook and displays only the pages with the selected status. For example, click the Rejected status icon to see only the rejected pages of the job in the Flipbook.
Cogwheel menu

Click the cogwheel in the top right corner to open a menu with the following commands (depends on current window):
•Approve all remaining pages: All pages awaiting approval are approved in a single action; the status of rejected pages remains unchanged.
•Download a softproof PDF: A PDF of all the rendered pages is downloaded.
•Show/Hide Bleed & Boxes: Shows/hides the bleed zones, the Page Size box (green) and the PDF Trim box (dashed magenta) in the units specified in your profile; switch to Single Page view if you want to see the bleed zones in the spine.
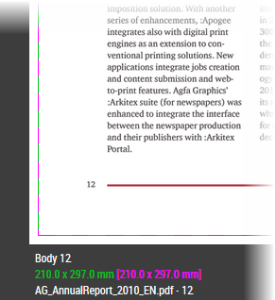
•Show Page Info: The Part (cover, body, insert) is always displayed under each page; choose this option to show/hide the Page Size (green) and the PDF Trim (magenta); under these box sizes you have the file name and the number of the page in this file. This option also displays the separation colors along the side of the Flipbook thumbnails.
•Show Help Pane: Displays the grey overlay pane with basic Help information for browsing and approving pages; you can always view this Help pane even if you clicked the Never show this pane again button.
•Online Help: opens the full documentation in a new browser window or tab.
Edit the users of a job
NOTE: Only for users with the Administrator role.
You may want to change the default roles assigned to users for a particular job. For example, Jane’s default role is Uploader and only Mary can approve pages. However, Mary’s not available to approve the job at hand and you want to assign the Approver role to Jane just for this job.
1 Click the Information icon to open the information panel.
2 Click the Edit button to display a list of users and their role.
3 Select the check box next to a name in the first column to assign the Uploader role, and in the second column to assign the Approver role.
4 Click Save and click the black cross to close the information panel.
Search jobs
You can use the Search box to search for a job in the list of jobs.
1 In the Search box in the top right corner, enter your search query, for example words included in the title of the job, and press Enter.
2 If the Search box contains text, clear the box with the cross icon.
Shortcuts – Jobs Window
Press on Number Pad | To |
CTRL i | Open the information pane |
Esc | Close the information panel |