Initial Logon of Printer Company
When the installation of WebApproval has been completed, the system contains one company called the Printer Company which represents the printer’s organization. This Printer Company initially has one Administrator who is responsible for managing the WebApproval application. To get started with WebApproval, you need to change the user settings of this initial Administrator. Once this has been done you can start setting up your system, create Print Buyer companies, add users, etc.
Log on as the initial Administrator
1 In your web browser, enter your WebApproval URL followed
by /setup.html
e.g. www.myWebApproval.com/setup.html
NOTE: You can find the URL in the WebApproval tab of your Apogee Prepress System Configuration.
2 Enter a password of your choice to go to your account settings.
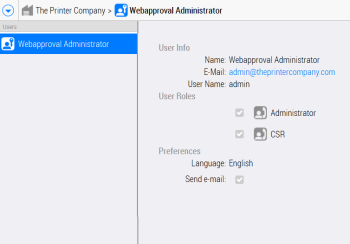
The account details of the initial Printer Company Administrator are displayed.
3 Click Edit in the bottom right corner to open your account details.
4 In the User Info panel, the following details must be changed:
•First Name and Last Name: This is the name that appears in the WebApproval application. We recommend that you enter your actual name instead of WebApproval (first name) Administrator (last name).
•E-mail: You must enter your own e-mail address here. This e-mail address can be used to log on.
•User Name: (Optional) You can also use the user name as specified here to log on. We recommend that you change this user name or at least make a note of the default user name, i.e. admin.
5 Edit the User Roles and Preferences as required.
6 Click Save and Close.
The initial Printer Company Administrator user has now been set and is ready for use the next time you log on.
CAUTION: The e-mail address or user name are required to log on to WebApproval, so be sure to make a note of them.