Approving and Rejecting Pages
NOTE: Only for users with the Approver role for the job.
Pages can be inspected and approved or rejected by users with the Approver role. The pages of a job can be inspected in the Flipbook once they have the Ready to Inspect status which is indicated with a blue icon.
Open and inspect a job

To open a job for inspection, do one of the following:
Click the link in the e-mail that you received notifying you that a job is ready to inspect. The WebApproval application opens in your browser and displays the job to be inspected.
OR
In the Jobs window, you can see if a job has pages to inspect by opening the information panel of a job. Click the job tile to open it.
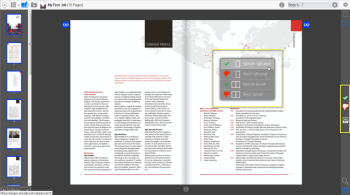
The Actions panel on the right is active and the Approve/Reject commands are displayed in the Actions menu.
Approve or reject pages (Actions panel buttons)
1 Go to the page or spread that you want to approve.
2 Click the Approve button.
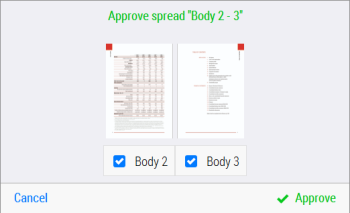
3 If you are in spread mode, select or clear the boxes for the right and the left page as required.
4 Click Approve to submit the page or spread.
The green Approve icon is displayed in the top corner of the page and the page thumbnail has a green border.
Approve or reject pages (Actions menu)
This is an alternative procedure for approving or rejecting pages.
1 Open the job and right-click a page to open the Actions menu.
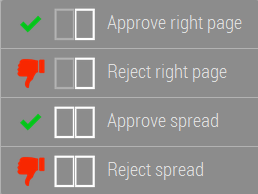
2 Choose one of the options in the list to approve or reject the right or left page (depending on the current page) or the spread.
Approve all pages

On any page in the document, open the cogwheel menu and choose
Approve all remaining pages.
All pages with the Ready to Inspect status are approved.
Reject a page and create a remark
1 Go to the page or spread that you want to reject and click the Reject button.
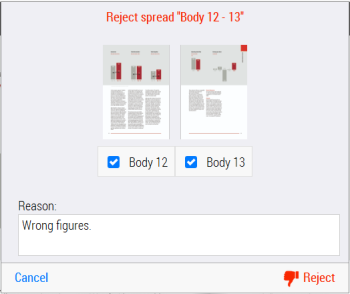
2 If you are in spread mode, select or clear the boxes for the right and the left page as required.
You must enter a reason for rejecting the page or spread.
3 Click Reject to submit the rejection and the reason.
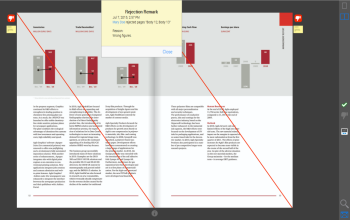
A red diagonal line across the page indicates that the page has been rejected.
A red Reject page status icon is displayed in the top corner of the page, together with a Remark icon, and the page thumbnail has a red border.
Other WebApproval users can open and read the remark by clicking the icon. The remark is also sent to the printer.
Approve a rejected page
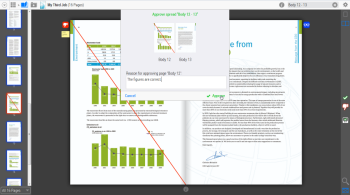
1 Go to the rejected page or spread that you want to approve and click the Approve button.
You must enter a reason for approving the rejected page or spread.
Overview of Action buttons

Open the job and use the icons in the Actions panel on the right to approve or reject a page.
| | Quick Approve
Approves the current, single page or spread without displaying a confirmation window, and takes you to the next page in the document that is awaiting approval. |
| | Approve
Displays a confirmation window where you can confirm or cancel the approval of the left or right page or the spread. |
| | Reject
Displays a confirmation window where you can confirm or cancel the rejection of the current page or spread. You must add a reason in the comment field when rejecting. |
| | Go to Next to Approve
If the current page has been approved or rejected, takes you to the next page in the document that is awaiting approval. |
| | Approve all remaining pages
Choose Approve all remaining pages in the cogwheel menu and all pages awaiting approval are approved in a single action; the status of rejected pages remains unchanged. |
You must provide a reason for rejecting a page and this reason is visible in a page remark. The yellow remark icon opens the remark box. You must also provide a reason when approving a page that was rejected earlier.
