Creating a two up Come&Go imposition with Agfa Apogee Impose
At A Glance
The Bindings Options resource of Apogee Impose allows for the creation of N up or multiple up binding. In a traditional two up binding job two books are printed and folded as one. The at the end of the binding process the two books are cut apart. This is done quite often on smaller format book sizes such as 6x9 inches or 4x5 inches to shorten the production time. This process can also be done as a "Come&Go". In this case the book is still done two up but the second book is in reverse order.
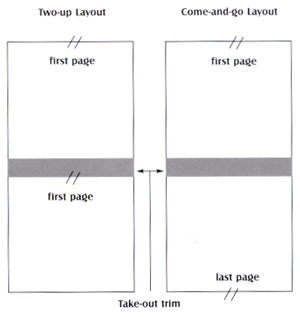
The example used in this document is a 176 page 6x9 inches book. There are 3 press sheets. The first and second press sheet are 36 pages running 2up Come&Go. The third press sheet is 16 pages running 2 up Come&Go. This type of binding presents a few unique concepts but when completed it will show how powerful a tool Apogee Impose is.
Applies To:
:Apogee Prepress Manage or Integrate
How It Works
- The process begins by creating the Bindings Option resource for doing a 2 up come and go. Open the System Overview Window and click on the Impose task processor.

- Double click the Binding Options resource found in the resources panel.

- Use the [+] or [++] tool to create a new Binding Option.
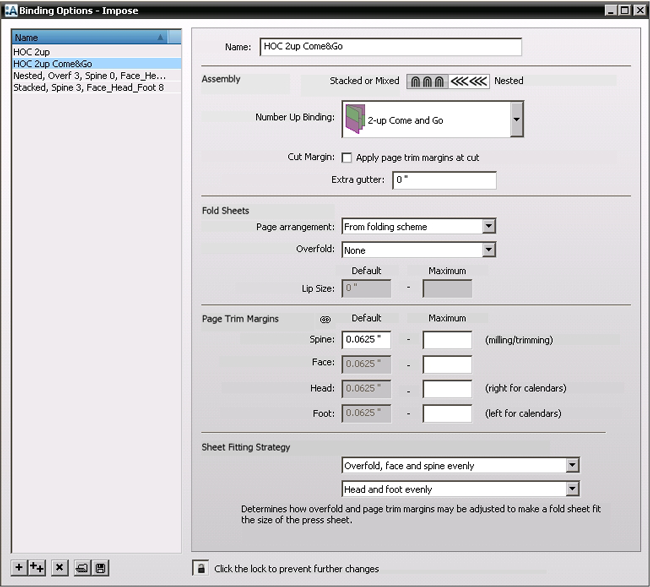
- For this job the Assembly is perfect bound so choose "Stacked or Mixed".
- Select 2-up Come and Go in the Number Up Binding.
- For this job a .0625 inches Page Trim Margin is being used for Spine, Face, Head and Foot.
(Sheet fitting is not being used.) - Choose an appropriate name.
- Create a Product definition by opening the Product resource.
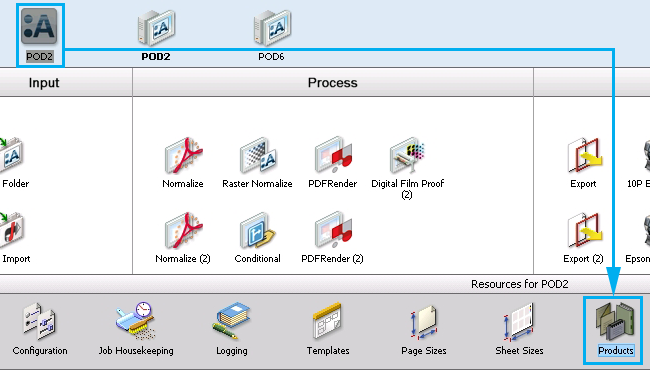
- Use the [+] or [++] tool to create a new Product.
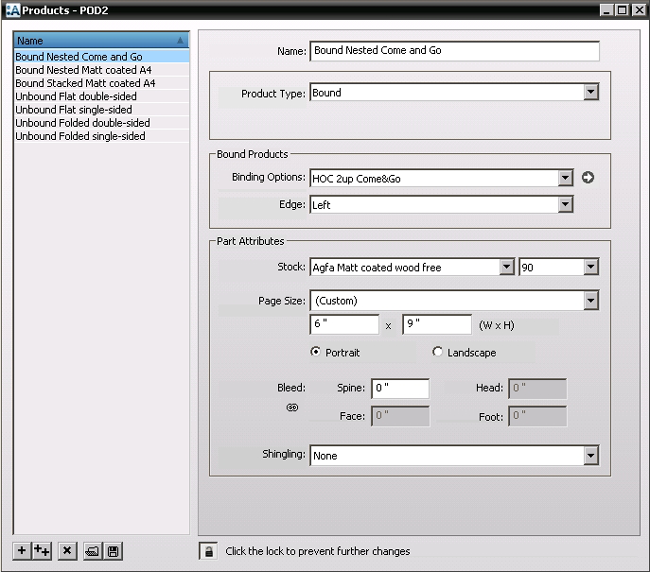
- Set the Product Type to Bound.
- Select the newly created Binding Option.
- Page Attributes have been set for a page size of 6 by 9 inches with no bleed.
- Now that the Binding Options and Products resource are ready begin creating a new job.
- Select the desired ticket template and in the Quick Fill window select the newly created Product.
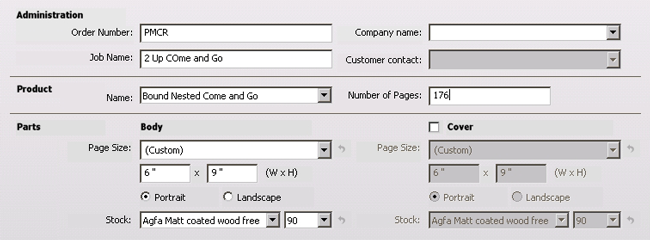
- The number of pages for this job is 176.
- In Press Sheet Layout select "Center Center" and click Edit Imposition.
This where is starts to get interesting. Because this is a 2 up come and go splitting the assembly has to be done so that you have two halves of a book. Then the two halve are split inverted to each other. With a come and go the back pages will end up joining the front pages.

- For this 176 page book running on three press sheets the assembly is split.
- Select the appropriate 36 page folding scheme for FS1. When done BS1 and BS6 will combine on to PS1.
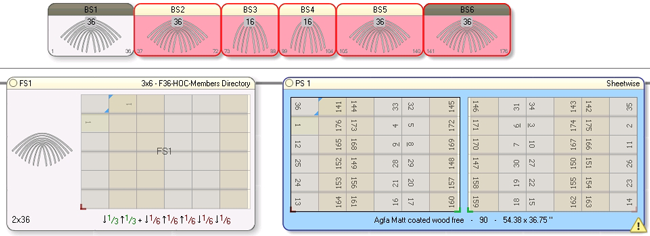
- Repeat the fold scheme selection for FS2. This will combine BS2 and BS5 on to PS2.
- Select the appropriate 16 page fold scheme for FS3. When done BS3 and BS4 will be combined on to PS3.

- Drag PS1, PS2 and PS3 on tot he appropriate Press.
This leaves FS4, FS5 and FS6 without assigned fold schemes. Even though BS4, BS5, and BS6 have been placed on press sheets these fold sheets still require assigned fold schemes.
- Assign the same fold schemes in reverse order to the remainder of the book.

When this is done the "extra" fold sheets and press sheets will gray out.
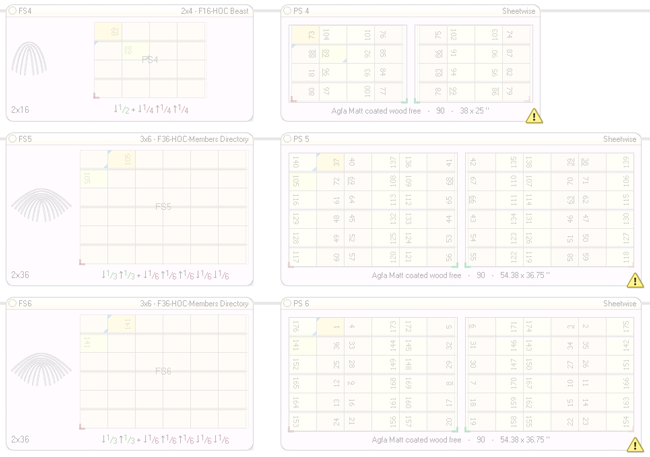
- Drag PS4, PS5, and PS6 on to the same press as PS1, PS2, PS3.
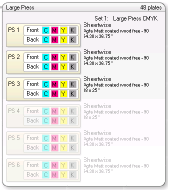
This is the final unique feature of working with a 2up come and go. When this job is then submitted the extra press sheets will be omitted and will not appear in the Results tab.


 RSS
RSS
