How to use Apogee Impose to produce a perfect bound book with a glue-in page
At A Glance
Perfect bound books will generally have a page count that is divisible by 4. Sometimes there can be an extra page. This is referred to as a glue-in or tip-in page. For this example we will work with a 218 page book. It will bind as six 32 page fold sheets plus one each of a 16, 8 and 2. These will run together on one press sheet.
Applies To:
Agfa Apogee Prepress Manage or Integrate
How It Works
- Begin by opening a ticket template. In the quick fill window select an appropriate perfect bound product and define your page count.
For this example I am using 218 pages. The page size in this example is 6" x 9".
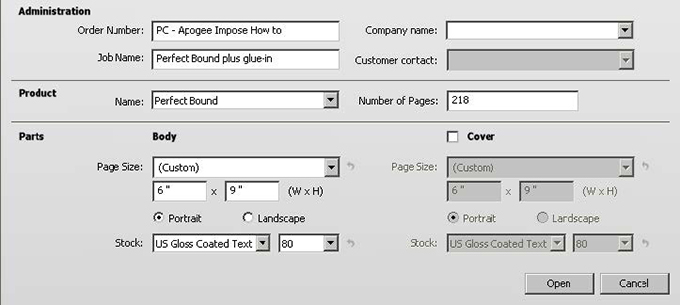
- Once the ticket editor is open go to the product tab and select the appropriate press sheet layout.
- Click edit imposition.

- Proceed to split the body assembly into the required fold sheets.
NOTE: If you use the split tool and hold down the Ctrl+Alt key the assembly will automatically split into multiple fold sheets. The gray lines that appear indicate the additional splits. Split the fold sheets to have the same number of pages. Left over pages will be listed as the final fold sheet. - For this example begin by splitting the job in to as many 32 page fold sheets as possible with leftover foldsheets of 26 pages.

- The remaining 26 pages Foldsheet will be split in to 16, 2, and 8 page fold schemes in this order.

- FS7, 8, and 9 all belong on the same press sheet (PS7). This is a diagram of what needs to be done.
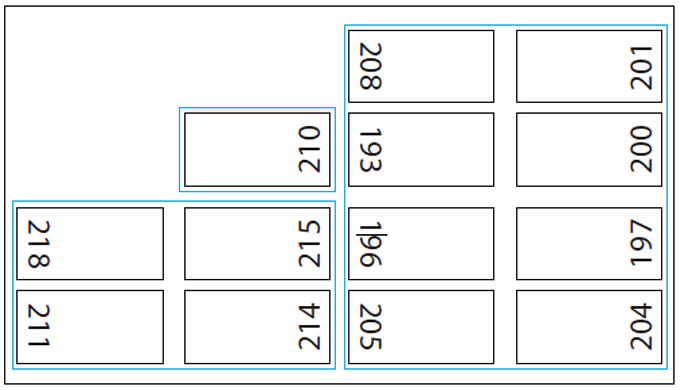
- Define the press sheet size of PS7 before dragging the first fold sheet in place. (40" x 28")
- Select the appropriate fold schemes for each fold sheet. (FS7:F8-7, FS8:F2-1, FS9:F16-7
- Drag FS7 on to PS7. Press the spacebar while dragging to rotate FS7 before finishing the placement.
- If not already open, open the Inspector window. Select PS7 and click on the arrow to change the press sheet layout.
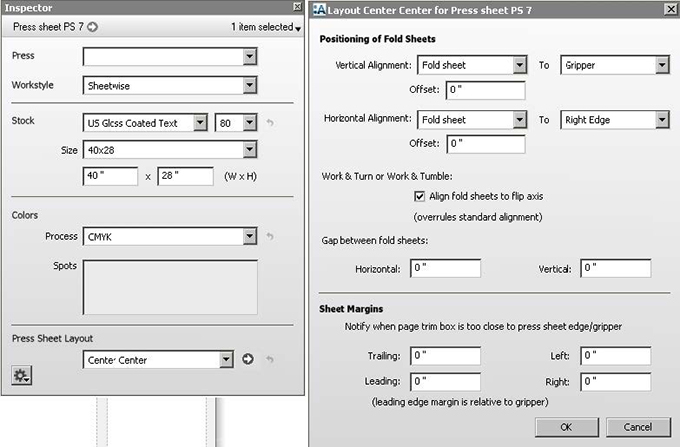
NOTE: When placing multiple fold sheets on one press sheet it is easier to do if you begin with everything building up from the bottom and from the right or left. To accomplish this change the vertical alignment to Gripper and horizontal to Right Edge. After the fold sheets are placed you can easily revert back to reposition the fold sheets in to the proper place on the press sheet. - Drag FS9 on to PS7 drop it when the blue insert bar appears on the left side of FS7
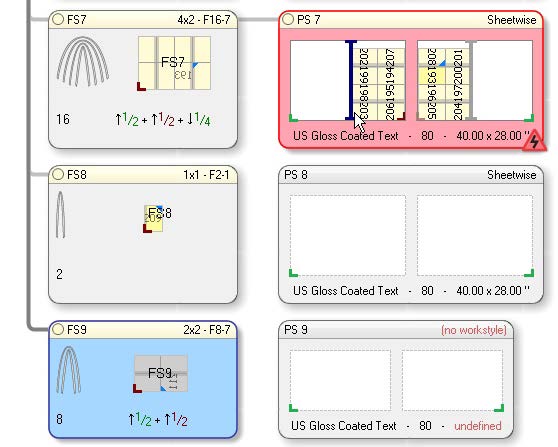
- Drag FS8 on to PS7 drop it when the blue insert bar appears on the top of FS8
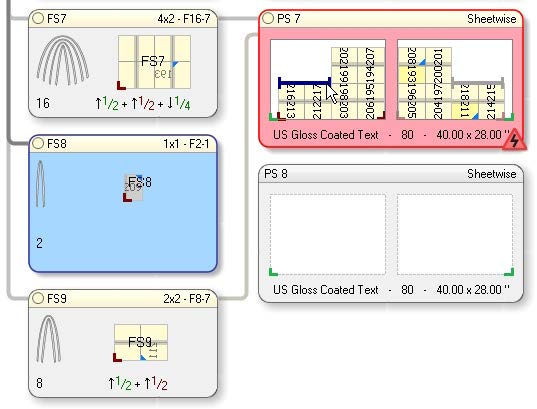
- Now that the fold sheets are placed, open the inspector again and revert the press sheet layout to reposition the fold sheet into the proper place on the press sheet.

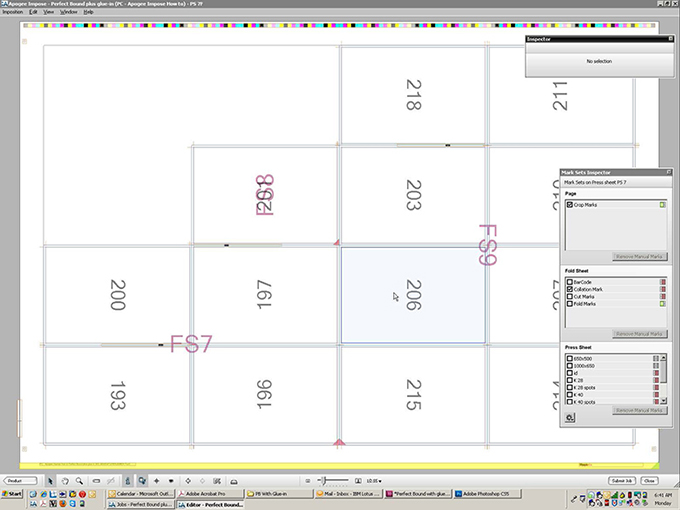
This job is another example of the power of Apogee Impose. It is possible to use a single page in a
perfect bound.


 RSS
RSS
