Uploading Files and Placing Pages
NOTE: Only for users with the Uploader role for the job.
Jobs appear in the Jobs window once they have been prepared by the Printer Company. If you have been assigned the Uploader role, you can upload PDF files and place the pages in the job. Files are uploaded for a particular job so you cannot use a file you uploaded for one job in a different job.
Upload files
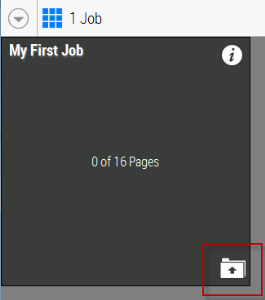
1 Go to the Jobs window and click the Upload icon in the bottom right corner of the job tile.
NOTE: If you don’t see an Upload icon, you are not authorised to upload files for the job.
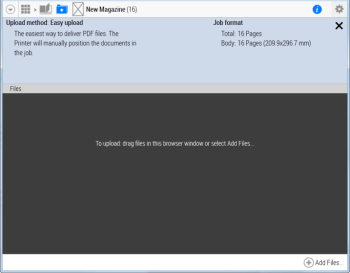
The Files window is displayed which consists of an information panel that can be opened and closed, and the upload panel.
2 You have two options to upload files for the job:
Click Add Files to browse to the PDF files you want to upload.
OR
Drag the PDF files from your file browser onto the dark upload panel.
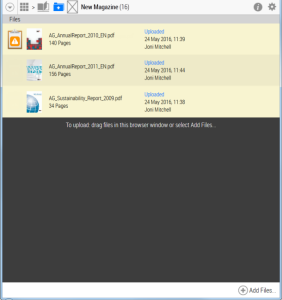
The files are added to the Files window.
3 Upload more files if necessary. If the job has different parts (cover, body, insert), you will probably want to upload different files for each part.
4 Click the Flipbook icon in the top navigation bar to start placing the pages.
Place pages
1 If you just finished uploading files for the job, click the Flipbook icon in the top navigation bar.
OR
If you are in the Jobs window, click the job tile to open the Flipbook.
The flipbook opens on page 1. If you want to start placing pages on a different page, go to the page by clicking the thumbnail in the navigation panel on the left.
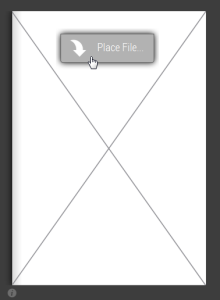
2 Right-click the Flipbook page where you want to place a page or pages from your uploaded files, and click Place File in the action menu.
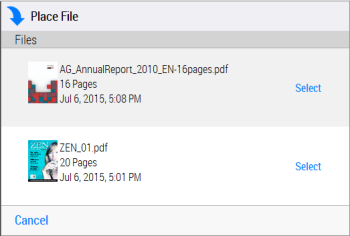
The Place File window appears with a list of uploaded files.
3 Click Select next to the file that you want to place.
The pages are placed, starting from the current page in the job. If the file contains more pages than the remaining pages in the job, the last pages are not placed. It is not possible to place a specific page from a file on a specific page of the job. In this case, you need to upload a file that only contains the page in question.
4 Click Place to confirm.
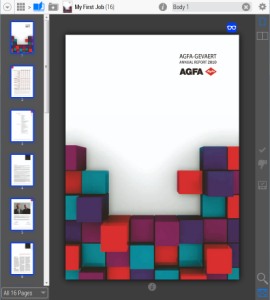
As the pages are processed, the thumbnails in the left navigation panel and the Flipbook pages are filled.
A blue icon in the top corner of the pages indicates that a page is ready to be inspected.
At this stage it is still possible to:
•upload more files for placement: click the Upload icon in the top navigation bar to go to the Files window.
•place a different file on pages that already have pages placed on them: right-click the page and choose Place File.
Users with the Approver role receive an e-mail notification to inform them that the pages are ready for inspection.
Replace pages
1 If you want to replace the placed pages of a job, follow the steps to
Place pages.
2 In the Place File window, select a file that is not in use (i.e. which has not been placed for this job). A file which has already been placed is indicated as in use.
NOTE: It is not possible to replace pages using the same placed file.
3 Click Select next to the file that you want to place.
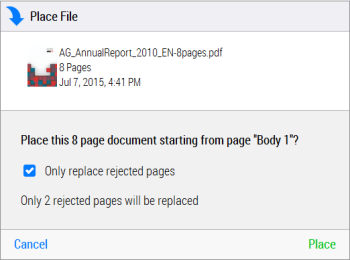
The system checks the status of the pages in the job and informs you if pages have been approved or rejected.
NOTE: Approved pages cannot be replaced.
4 If you only want to replace rejected pages, select the Only replace rejected pages box.
The corresponding pages in the new file will replace only the rejected pages.
OR
If you want all the pages of the new file to be used, make sure Only replace rejected pages box is cleared.
5 Click Place.
The pages are replaced as requested and reprocessed.
Review uploaded files with preflight report
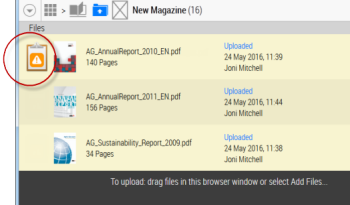
Files that you upload for a job are checked by the WebApproval system against a number of criteria to ensure that the job can be processed properly. This process is referred to as preflighting. Uploaded files with preflight issues are flagged with a yellow preflight report icon next to the file thumbnail. This preflight report should be reviewed before placing the file. Preflight issues will also be flagged in the Flipbook if the placed pages have issues.
NOTE: The Printer Company may decide that files with preflight errors and/or warnings cannot be placed by uploaders, and the job cannot be processed before the issues are resolved.

In the Files window, click the preflight report button to the left of the file thumbnail.
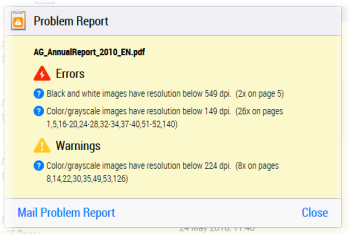
The Problem Report is displayed with a list of errors and warnings and the pages where these issues occur in the file.
There are two types of preflight issues:
•Errors: the message describes an issue which is critical and should be resolved before placing the file
•Warnings: the message describes an issue which is not critical
For more information about each individual issue, click the blue Help icon.
To save the Problem Report, click Mail Problem Report and an e-mail containing the list of issues is created in your default mail program with your profile e-mail address as recipient.
NOTE: It is recommended to discuss preflight issues with the Printer Company to avoid unexpected results in the printed product.
Review and replace pages with preflight remarks
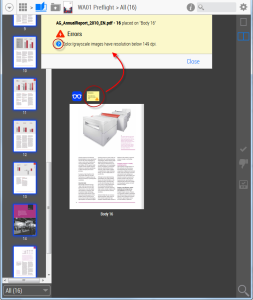
Filled pages may have preflight issues if you placed an uploaded file that has a preflight report. These preflight issues are flagged by the WebApproval system with a yellow preflight remark icon in the top corner of the filled pages in question. As an uploader, you can review these preflight remarks and replace the pages if necessary.
1 In the Flipbook, click a preflight remark icon to open the preflight remark that lists the issues for that selected page. Click the blue Help icon for more detailed information about the preflight issue.
See
“Review uploaded files with preflight report” for more information on preflight issues.
2 Close the preflight remark and context-click the page and choose
Place File to place an uploaded file and replace the content. If you only want to replace the current page, make sure the new file is only one page. Otherwise all subsequent pages will also be replaced. See
“Place pages” for more information on placing a new file.
Create a preflight report PDF
Printer Company users can create a PDF of the preflight report which contains the full specifications of the document and all the preflight issues.
To create a PDF of the full preflight report, go to the Files window and click the PDF Report button to the right of the file.
Remove a placed file and clear a page
When replacing pages, you may want to remove a placed file or page before placing the new file.
As an uploader, you can remove a placed file from the job or clear a specific page.
1 Open the job in the Flipbook and right-click a page to open the Actions menu.
2 Choose one of the following:
•Remove File: removes the file used to fill the current page; this action empties all the pages that use this file
•Clear Page: removes the content from the current page
The pages are now empty.
Place files in multi-part jobs
A product consists of at least a Body part but may also have a separate Cover and an Insert:
•Cover: outside front cover (OFC), inside front cover (IFC), inside back cover (IBC) and outside back cover (OBC)
•Body: the pages between the front and the back cover;
•Insert: the pages inserted as a separate component inside the other two parts
If the job at hand is for a product with parts, i.e. a multi-part job, you can place a dedicated files for each part.
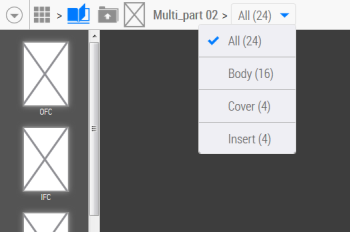
1 In the top navigation panel of the Flipbook, click the Parts drop-down list to display a list of the parts in your job. The Part s drop-down list is only available for multi-part jobs.
2 Select the part you want to review of for which you want to place a file.
The pages you now see in the Flipbook are for the selected part.
3 Place a dedicated file for each part as described in
“Place pages”.
NOTE: The pages of a file are not placed across different parts.