Working with Companies and Users
Edit your Printer Company details
NOTE: Only for Print Company users with the Administrator role.
You will probably want to change the default company information, and for example, specify the real name of your company. You can also specify the settings for softproof PDFs that can be downloaded by the users of your printer company.
1 Open the menu in the top left corner and choose Companies to view the list of companies.
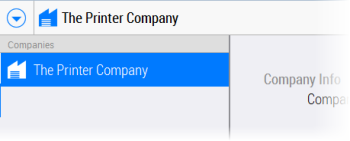
2 Select the Printer Company.
This is the company with the factory icon:
NOTE: The Printer Company is initially the only company in the list.
3 Click Edit in the bottom right corner to open the company window and edit or add details. See
“Company Settings” for an explanation of the settings.
4 Click Save and Continue.
Create Users for the Printer Company
NOTE: Only for Print Company users with the Administrator role.
An administrator can create additional Administrators or CSRs (Customer Service Representatives) for the Printer Company.
1 Open the menu in the top left corner and choose Companies to view the list of companies.
2 Select the Printer Company.
3 Click Show Users in the top right corner to display the list of Users.
NOTE: Initially, the WebApproval Administrator is the only user in the list.
4 Click the Add icon in the bottom left corner of the list to open the user settings. See
“User Settings” for an explanation of the settings.
5 Complete the User Info and choose a User Role – Administrator or CSR. You can also set the language and messaging options.
6 Click Save and Continue.
The new administrator or CSR is added to the list of users in alphabetical order. He automatically receives an e-mail with the WebApproval URL, inviting him to participate in the collaboration workflow.
Create a Print Buyer company
NOTE: Only for Print Company users with the Administrator or CSR role.
Prerequisite: create a user with CSR role first.
You will create Print Buyer companies for the customers with whom you want to collaborate via WebApproval.
1 Open the menu in the top left corner and choose Companies to view the list of companies.
2 Click the Add icon in the bottom left corner of the list to open the new company window.
3 Complete the details for the new company. All the information you enter here will be visible for the users of your Printer Company and the Print Buyer company in question. See
“Company Settings” for an explanation of the settings.
4 In the User Role Presets section you can assign CSRs, Uploaders and Approvers for this company:
•The Printer Company CSRs: These are the Customer Service Representatives in your printer company who will be assigned to this customer.
NOTE: All users with Administrator role are also in this list because they are automatically CSR.
•Your new company users: This list is initially empty. These users may also be added later by the administrator of the Print Buyer. They can be Uploaders, Approvers or have both roles.
5 Click Save and Continue.
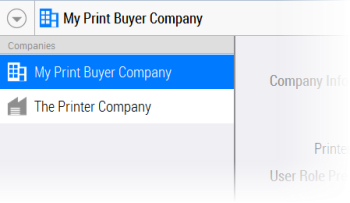
6 The new Print Buyer company is added to the list of companies.
A Print Buyer company has the office building icon:
You can still go back and edit the company details, or you can start adding users.
7 You can add a second Print Buyer company if you want.
Notice that the companies are arranged alphabetically in the list. The selected company is also indicated in the top navigation bar.
Create Users for a Print Buyer company
NOTE: Only for Print Company users with the Administrator or CSR role.
A Printer Company Administrator must create at least one user with the Administrator role for the Print Buyer company. This is the user who is responsible for the application in his company. A Printer Company Administrator can also create Approvers and Uploaders for the Print Buyer company but these will generally be created by the Print Buyer administrator.
1 Open the menu in the top left corner and choose Companies to view the list of companies.
2 Select the Print Buyer company.
3 Click Show Users in the top right corner to display the list of Users.
Initially, this list is empty.
4 Click the Add icon in the bottom left corner of the list to open the user window.
5 Complete the User settings. See
“User Settings” for an explanation of the settings.
NOTE: Fields with a yellow background are mandatory to create the user but you should also complete the other fields.
6 Assign one or more User Roles and a Messaging preference.
7 Click Save and Continue.
The new user is added to the list of users in alphabetical order.
The new user automatically receives an e-mail when the user is created. This e-mail invites the user to participate in the collaboration workflow and includes the WebApproval URL.
Create Users (Print Buyer administrator)
The Print Buyer administrator can create users for his company and choose the roles for these users.
1 Open the menu in the top left corner and choose My Company.
The Company window is opened with a list of users on the right.
2 Click the Add icon in the bottom left corner of the list to open the user settings.
3 Complete the User settings. See
“User Settings” for an explanation of the settings.
NOTE: Fields with a yellow background are mandatory to create the user but you should also complete the other fields.
4 Assign one or more User Roles and a Messaging preference.
5 Click Save and Continue.
The new user is added to the list of users in alphabetical order.
The new user automatically receives an e-mail when the user is created. This e-mail invites the user to participate in the collaboration workflow and includes the WebApproval URL.
Delete a Print Buyer company
NOTE: Only for Print Company users with the Administrator role.
1 Open the menu in the top left corner and choose Companies to view the list of companies.
2 Select the company you want to delete and click the Minus icon in the bottom left corner of the list.
3 Click Delete to confirm.